
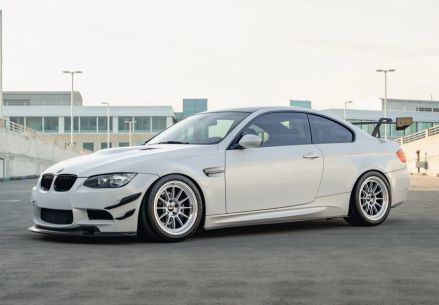
F8X rear wheel development: Optimizing fitment for 11" wheels and 305-315 section tires
Article | 10/09/2015 by Tom Maloney
Updated on 08/06/2024
Article updated on: 4/4/2023
NOTE: The fitments developed in this article have been proven on thousands of F8X chassis so far and continue to be a popular width and offset for those seeking to maximize rear wheel and tire width. We now offer multiple designs and diameters of this fitment and it's a versatile option for both street and track paired with multiple front wheels. To learn more about fitments and tires recommended for your M4, head over to our fitment guide.
If you'd like to pick up a set of these wheels, be sure to head over to our F80 M3 or F82/F83 M4 wheel configurators.
The Objective:
Our goal was to figure out the best wheel & tire combo for both stock and modified F80 M3’s and F82 M4’s that want to add a lot of grip. In this write-up, we start by sharing the process we took to find the most optimal rear wheel fitment for running wide tires. We’re looking forward to creating more technical articles like this in the future.
Just like each previous generation M3, these cars require a unique wheel width and offset to go as wide as possible. Recycling old fitments is a major compromise and doesn’t allow for 305 or 315 tires to fit properly. It’s even harder to fit R-Compounds in those wide sizes. Existing F8X wheels on the market are aesthetic-oriented and focus on fender “flushness” with typical street tires. Achieving our goal required us to start fresh and research the right wheel width and offset ourselves. It took us two days and two volunteers to complete our testing, and even longer to compile it into a write-up. Sorry for the long wait.
Too Lazy; Didn’t Read: After absolutely exhaustive testing, we found that the 18×11” ET44 wheel with a 305/35/18 R888 tire is the best fit for the rear of the F8X M3/M4.
Based on our findings we’ve started production for this new fitment, and it’s scheduled to arrive in December. They will initially arrive in limited quantities. As always, we’re hosting a discounted Group Buy to support early adopters. Checkout our deal page for details and to follow along.
We’d like to thank Robert for volunteering his Alpine White M4, and Tim for volunteering his Individual-Colored M3. We’d also like to thank the team at Forgeline for quickly creating a special offset wheel that enabled us to conduct these tests.

THE TEST EQUIPMENT:

Wheels:
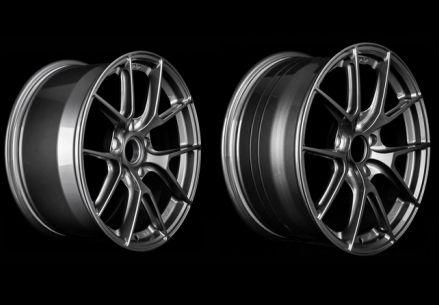
- Forgeline GA3R 18×11” ET52
- APEX EC-7 18×10” ET25
- OEM Style 437M 19×10” ET40
Hardware:
- APEX 75mm Stud Kit
Spacers: (For fine-tuning the fitment)
- APEX 12mm Spacer
- APEX 5mm Spacer
- APEX 3mm Spacer
Tires:
- 275/35/19 Michelin Super Sport – Extreme Summer Tire
- 275/35/18 Toyo Proxes R888 – R Compound
- 305/35/18 Toyo Proxes R888 – R Compound
- 315/30/18 Toyo Proxes R888 – R Compound
HOW WE CONDUCTED OUR TESTS:

Selecting a race-worthy fitment is not as simple as getting a wheel to sit flush with the fender. Our testing consisted of checking inner & outer clearances while the cars were both up on the lift and also on the ground. The range of full droop and compression needed to be reviewed as clearances change throughout the suspension’s range of motion.
THE TESTER WHEEL:
The M3/M4 requires higher offset wheels than the previous generation M3. Our hunch was that a mid 40’s offset would be needed to fit meaty tires on an 11” wheel. An off-the-shelf wheel would be too aggressive for this test, so we needed a wheel that would support a wide range of testing in case our hypothesis was wrong.
We knew the best way to test every offset was to build a custom wheel whose offset we could dial in for the perfect fitment. Our plan was to produce a high offset wheel and install it with various combinations of spacers to change the offset. We reached out to the team at Forgeline to produce a custom 18×11” ET52 wheel. They made us one in their GA3R design to guarantee ample brake clearance. This wheel would allow us to go as high as a 52mm offset and as low as we would find necessary during our testing.

TEST SPACERS:
To simulate the offsets we wanted, a combination of different APEX wheel spacers were used. While this isn’t suitable for road use, it was safe for testing purposes only as the combinations were often not hubcentric. For example, when we combined a 3mm and 5mm spacer to get and effective 8mm spacer, there was almost no hub left for the wheel to contact.
Warning: DO NOT stack spacers. Never drive on stacked spacers or a non-hubcentric assembly. Always use the correct length hardware with your spacers.


TEST STUDS:
We installed a set of APEX 75mm studs on each car since we’d be mounting and dismounting wheels at least a dozen times during each test day. Studs allow us to reuse the same hardware even when we use a varying combination of spacers. Additionally, the studs allow us to install the wheels without them falling off the hubs. Without studs, we’d be digging through a bucket of various-length lug bolts and aligning the holes in everything prior to threading hardware through. The APEX studs shown below use a 5mm allen for a quick and easy install.

FITMENT BREAKDOWN OF THE F8X CHASSIS:
Areas to look out for: Our testing consisted of a comprehensive check of inboard and outboard clearances. There are a few key areas where we check clearances when developing for late-model BMWs. We’ve labeled these photos with locations where we watched for possible rubbing. Brake caliper & rotor clearances have already been confirmed, so brake clearance is not discussed in this article.
OUTBOARD

Outer Metal Fenders (1)
- We definitely don’t want any contact here. Touching this means that the tire sticks out so far that the fender comes down on top of the tire during compression. This kind of contact mangles fenders and can be dangerous if the fender cuts into the tire deeply. In our tests below, we encountered a couple scenarios where the wheel sits proud of the outer metal fender.
Inner Metal Fenders (2)
- We want to avoid inner metal contact as well. These cars don’t have a thick metal lip like those of previous generation M3’s, so rolling these fenders is not an option without “pulling” the fenders. Rubbing here can deform the fender and burn the paint from the backside.
Plastic Fender Liners (3)
- From the factory, the inner plastic fender liner follows the contour of the wheel well arch very closely. Slight contact here is OK, but should be avoided when possible. If it’s unavoidable, you’ll hear the contact under compression. Fender liners are cheap to replace, so rubbing is often accepted in the name of performance, and usually only happens under extreme compression. On the fender side, you want to watch out for rubbing through the liners too deeply as you can begin to rub on the backside of the metal fender.
INBOARD


Rear Shocks (A)
- You never want your wheel or tire to make contact with the rear shock. The stock rear shocks come with a dust boot with a diameter larger than the body of the shock. Rubbing on the boot in a performance application is OK, as it can be removed if needed. Most aftermarket suspension kits either do not have an external dust boot, have a significantly narrower boot, or have internal dust protection. In this case, our fitment completely clears the stock rear shock & boot with more than ample clearance.
Chassis (B)
- Avoiding the chassis and subframe is vital for proper fitment. The wheel and tire is closest to the chassis when the chassis is in the air and the suspension is in “full droop”. (See “Understanding Suspension Droop”) Testing the fitment while up in the air will tell us the “worse case scenario” and will confirm chassis and bump steer clearances. We want to avoid any contact that would freeze up the wheel / tire assembly while the car is light/unloaded as it crests over a hill, or is aggressively cornering, trail braking, etc.
Plastic Liners (C, D, E)
- The factory plastic liner is molded around important components to protect them from rocks and other debris. In some areas, the molding is a tight fit to what it protects; in others, the clearances behind the plastic is very spacious. It’s very common for aftermarket wheel and tire fitments to rub plastic liners. Fender liners are cheap. Avoiding all rubbing usually results in an unnecessarily-conservative fitment. The key is to check what’s behind the plastic when looking at inboard liner contact points. There can be fuel or electrical components behind the plastic. More on this below.
Fuel System (F, J)
- The Fuel system is located on the passenger side of the car only. It’s crucial to avoid any contact with these system components, and we paid close attention to wheel and tire movement in these areas. Rubbing these components is not an option.
Understanding Suspension Droop Suspension articulation must be taken into consideration when measuring clearances. When the suspension is hanging in the air, (aka “droop”) the wheel assembly exhibits positive camber and toe in. Essentially, the wheel and tire assembly will be closest to unibody and chassis components at full droop.
Just as measuring during droop is important, looking at clearances while everything hangs in the air does not accurately represent all clearances. Measurements taken in the air are only one set of data points. When the car is on the ground at static ride height, there is noticeably more chassis-side clearance. Since most of the photos in this article are taken while in the air, please note that the car can have an additional 10-15mm of clearance to the inboard components (except in relation to the shock) when it’s on the ground. It’s also why outboard clearances can’t be measured while the car is in the air.
Fuel System Outboard clearance is the same on both the driver and the passenger side, but inboard clearance is much better on the driver side because it doesn’t contain any fuel system components. Testing only on the driver side of the car would result in a false positive. The large fuel components are located just in front of the shock on the passenger side, covered by plastic liners. There is also a white fuel line that runs near the front left corner of the tire on the passenger side.

We took measurements with the plastic liner on and off to understand how much space is behind it. With the liner removed we could see what areas are safe to rub on super aggressive fitments, what areas can be trimmed or removed, and what must be avoided. The liner protrudes 10-15mm out from the fuel system components in front of the shock. If the tire was close but not touching the plastic here at full droop, we’d still be confident that the fuel system would remain safe.

THE BASELINE TEST: FACTORY 19×10″ ET40 WITH 275/35/19 MICHELIN PSS

Our first test was a baseline inspection of a stock fitment. Robert’s workplace is conveniently located in the local Bay Area, so he graciously volunteered his M4. The car arrived on factory Style 437M wheels pushed out with spacers all around. The rear 19×10” ET40 wheels had 12mm spacers behind them. To get a good starting benchmark, we removed the spacers and documented the clearances of a stock setup. Robert’s car did have H&R lowering springs installed, but the tire clearance remains the same as stock.

We found ample room with the factory setup and it’s understandable why F8X owners would choose to run spacers on all 4 corners of the car. The factory 275 Michelin Super Sports have a stretched sidewall when installed on the 10” wheel. Our research found this BMW specific tire was made 0.5” narrower than the standard 275 Super Sport. You can see in the animated GIF below that there’s a considerable amount of room for the tire with it’s stretched sidewall. If the tire’s shoulder were completely square or bulging, that space would quickly fill up. OEs are always conservative as they have to be as cautious as possible. There’s definitely some room to go out, but what you can’t easily see is that the best direction to add width is inward.
TEST #1: 18×11” ET40 WITH 315/30/18 TOYO R888

We were excited to see the widest possible tire get mounted up first, so we started with the 315/30/18 Toyo R888. This tire is 1.2” (4.5%) shorter in overall height versus the stock tire size, but it’s significantly wider, and has a much “meatier” shoulder and sidewall. Above, you can see the factory 275/35/19 Michelin Pilot Super Sport vs. the 315/30/18 Toyo R888 on the right. The width and sidewall shape difference is significant.

To achieve the 40mm offset we wanted for this test, we installed a 12mm APEX spacer before installing the 18×11” ET52 test wheel on the car. Remember: Wheel offset minus Spacer Size = Effective Offset

Up in the air, this fitment has excellent inner clearance. There is ample room to clear every possible rubbing point that we labeled above. On the ground however, we found this fitment to be too aggressive in relation to the outer fender for our liking.
Note: The tire tread looks backwards on the driver side. These were mounted for testing on both sides of the car, and there’s no reason to flip the tread just for a test 😉

Fender Liner Clearance (Front Radius) The front corner is closest to the metal chassis unibody. The clearance to the chassis in the front corner of the wheel well is more than enough even with this aggressive tire size and wheel offset. Note the clearance differences in this area vs. the taller 305 tire in our later testing.

Fender Liner Clearance (Rear Radius) There is plenty of room around the rear radius of the wheel well. There is a few inches of clearance. None of our tests warranted any close attention to this area.

Rear Shock Clearance There is about 20mm of clearance between the tire and the plastic dust boot covering the rear shocks. With the boot removed, there would be another 5-10mm behind that. There is a lot of space here at this offset. Fitting a coilover conversion spring rear (Not a typical coilover kit, but a coil-spring-over-shock arrangement) would likely be tight, but there’s enough clearance here to feel very comfortable with all factory spring and shock setup.

Rear Shock Dust Boot The shock dust boots rotate easily around the shocks. If anything were to contact it, it would simply move out of the way or leave a slight rubbing mark. As mentioned above, aftermarket shocks either have a thinner boot or do not have one at all.
Comparing the results of the 18×11” ET40 315/30/18 to the known 18×10” ET25 275/35/18 Fitment To help illustrate this fitment as best as possible, we wanted to compare our new findings to a more useful reference point than just the stock wheels. Many of you looking for an 18×11” track wheel already have some experience with 10” wheels, so we decided to test our 18×10” ET25 wheels typically run by members here as a square track fitment with 275/35/18 tires.
Many members already own these wheels because they previously owned E9X M3’s and they brought the wheels over to the new chassis. Those wheels are more aggressive than stock, yet it’s been working alright with both extreme summer and R-compound tires. When mounted on the F8X M3/M4, the tire sticks out of the rear fender a little. Rubbing could potentially be an issue with Hoosier R7 or BFG R1 tires, but overall it seems to work fine. This fitment is definitely at the limit of outboard clearance. The 18×10” ET25 wheel could not properly accept a 285 or wider tire at that offset without encountering fender issues.
Why is the 18×10” ET25 wheel with a 275/35/18 tire so relevant to this test? Despite their wheel and tire width differences, the face of 18×11” wheel at ET40 sticks out of the fender nearly to the same location the 18×10” wheel does. Below we go into exact detail.

In the photo above you can see the 315/30/18 Toyo R888 mounted on an 18×11” wheel. On the right hand side is a 275/35/18 Toyo R888 mounted on a 10” wheel. The narrower wheel on the right was raised 1” to be in alignment with the wheel on the left. This way we could accurately compare the sidewall shape of the two different tires, mounted on different wheel widths.
The 315 tire is actually 0.2” shorter than the 275 tire, and it has a slight bulge vs. the 275 which is almost perfectly square on the rim. This photo illustrates that the 315 tire will need a few millimeters more clearance vs. a comparable 10” fitment with a 275 mounted. This is why just using a wheel offset calculator to match placement within the fender is risky. Wheel calculators do not account for sidewall shapes.
The 18×11” ET40 wheel sticks out 13mm more than stock, while the 18×10” ET25 wheel sticks out 15mm more. Robert’s factory 19” wheels combined with his 12mm spacers are within 1mm of how aggressive the 18×11” ET40 wheel is towards the fender.
Tech Note: Factory wheels with spacers are not a good benchmark setup for fitment. Although the wheels are similarly aggressive, the tire fitment is very different when you factor in sidewall shapes. The 275 width Michelin Pilot Super Sport is stretched on the 10” wheel while the 315 width R888 is bulging off the 11” wheel. When compared side-by-side in a previous photos, you could see how much wider they are.
The 18×11” ET40 wheel reaches 13mm further in than stock, and 28mm more than the 18×10” ET25 wheel.

It’s very apparent in the photo above that the difference between these two wheel/tire combos is that all the extra width of the wider tire is added to the inside.
Strut tube clearance is still excellent with the 315 tire. Inner clearance space is clearly a missed opportunity with the aggressive offset 10” wheel.

Conclusion for Test #1 — 18×11” ET40 with 315/30/18: This fitment is a bit too aggressive for our taste. Although it’s 2mm more conservative than the 18×10” ET25 setup, the tire is slightly wider and quickly uses up the 2mm, and then some. We wanted a fitment that would have the most tire flexibility possible. Even meatier race tires like the BFG R1 and Hoosier R7 tires would likely kiss the fender under full cornering load, at this offset. There’s still a little more room to set the wheel further back into the fender, so we’re convinced this offset isn’t perfect. ET40 could be a fine offset for most extreme summer tires and regular summer/performance tires where a flush look is the priority, but a flush look can leads to rubbing on track. There is no point in being a few millimeters too aggressive. We’d rather continue our search for an offset that works with the widest tires, and can be pushed out with spacers when narrower tires are used.


TEST #2: 18×11” ET44 WITH 315/30/18 TOYO R888
Our second test was nearly identical to the first but with an offset that places the wheel 4mm further inward toward the chassis. We removed the 12mm spacer and replaced it with a combination of 3mm and 5mm spacers stacked together. This acted as an 8mm spacer and effectively created an 11” wheel with an offset of ET44.

This configuration was only 9mm closer to the fender compared to the stock wheels, which is 6mm more conservative than the 18×10” ET25 wheel we tested.
On the chassis side, this configuration has 17mm less clearance than stock. It still cleared everything on the inside even though it was 4mm closer to the chassis than the 18×11” ET40 we tested previously.

Our results on the driver side made us consider testing even higher offsets. Since there was still a bit of room left on the inside, we chose to focus on how far inward we could set the wheel. Other options we wanted to asses were producing an 11.25” or 11.5” wheel to maximize the use of all the available space. Although a wider wheel may work with these exact tires, we need to be conservative enough to leave room for R1 and R7 tires that can run even wider than the R888’s we tested. We also hadn’t tested a taller tire yet, and we know that overall diameters impact fitment in interesting ways. That means the next test is with the taller tire at this same offset. Based on those results we would decide if it’s wise to pursue higher offsets or wider widths.

Conclusion for Test #2 — 18×11” ET44 with 315/30/18 After testing on the passenger side, we concluded that 18×11” ET44 is the ideal offset for running a 315/30/18 R-compound. This fitment offered more outboard fender clearance compared to both the 18×10” ET25 and the 18×11” ET40 wheel we tested earlier. Clearance is good on the inside. An 18×11” ET44 wheel should allow for an even meatier tire like a Hoosier R7 or BFG R7 to clear the fender, but those tires may brush the inner plastic liner at full droop, which, with concessions for track performance, is considered acceptable. We don’t feel it’s wise to run an offset any higher than this, at this width.
A street tire run on this configuration could be spaced out as needed if being flush was the absolute priority. Our goal was to find an offset where the tire lives inside the fender and can handle extreme loads like compression in the corkscrew at laguna.

TEST #3: 18×11” ET44 WITH 305/35/18 TOYO R888

Our third test was with the taller 305/35/18 Toyo R888. This tire has a much more familiar diameter as it is only 0.4” (1.5%) shorter than stock. Our first test with this tire size was on the 18×11” wheel at the 44mm offset which we preferred from our previous 315/30/18 test.

The 305/35/18 tire is obviously taller than the 315/30/18, but they looked very similar in width. Toyo’s technical data lists these two tires as having only a 0.1” difference between their section width and tread width. Comparing the two tires in person we could really see this.

Laying a straightedge over the tread made it obviously clear which tire was taller.

Doing the same when the tires were on their side was a different story. The difference was negligible. We measured a 2.54 millimeters difference, which matches the 0.1” reported by Toyo’s own specs.
Before even mounting these wheels, our immediate hypothesis was that the 305/35/18 Toyo R888 tires would, in most cases, be the best tire for F8X owners to use. 315/30/18 tires from other brands that don’t have this sizing fluke, or other brands not available in the taller 305 size will remain an excellent choice.

There is one drawback to running a taller tire: the added height reduces some of the inboard unibody chassis clearance. Upon mounting on the driver side, we noticed the tire is much closer to the inner front corners of the fender liner. There was still about 10mm of clearance, but it was clearly closer.

Knowing about the fuel system on the other side from earlier in the post, it was time to test this fitment on the passenger side to test clearances. The image below shows the inner corner just in front of the tire on the passenger side. There is a fingers worth of room (about 10mm) between the tire and the plastic liner. We pay significant attention to this corner as there is a white fuel line that runs behind the plastic. In this photo you can see that it’s conveniently located just out of reach of the tire’s diameter. (The 315/30/18 tire would be even further away from this line as it’s OD is shorter). If the 305 tire were to flex enough under cornering-forces to contact the liner, it would be contacting where there is nothing significant behind the plastic. The hose would be just out of reach. Remember— this photo is taken at full droop. When the car is sitting on the ground, there is anywhere from 10-15mm additional clearance at this location.


The area of most concern was the plastic liner covering the fuel system near the shock. The below photograph is taken looking straight up. At full droop there is only a few millimeters of clearance. On the ground I could get my finger between the tire and this plastic (about 10-15mm of clearance). If the suspension were at full droop while driving, the tire’s sidewall would not be deflecting towards the plastic liner, it would be at rest. Despite the close distance between the wheel and the plastic fender liner covering the fuel filler neck, we were comfortable with the inner clearances at this offset when using a 305/35/18 Toyo R888. The 315/30/18 would be 1mm closer, so it would just kiss this small section of plastic.

To better understand the consequences of light plastic liner rubbing in this area, we removed the rear fender liner and checked clearances again. We found the plastic liner to be molded very conservatively here, bulging 10-15mm further out than necessary. This validated that if the plastic were “kissed” by the tire in a rare circumstance, the fuel system would remain out of reach.

Conclusion for Test #3 — 18×11” ET44 with 305/35/18: This configuration was our preference among the different fitments we tried. It is the best overall diameter and is essentially the widest wheel and tire that will fit without modification or significant rubbing. This rear fitment would pair well with a 275/35/18 front tire on an APEX EC-7 18×10” ET25 wheel.
The 305/35/18 is 1.5% shorter than stock, and the 275/35/18 is 1.2% shorter. This is as close as you can get to a perfect factory Overall Diameter while going significantly wider.
TEST #4: 18×11” ET46 WITH 305/35/18 TOYO R888
We conducted a mini-test at ET46 to see what would happen. The tire made full contact with the inner liner at droop where the plastic covers the fuel system, and left only a few millimeters in the front corner. We didn’t like this offset as it represents compromises that are dangerous and further testing is invalid if the fitment can cause safety concerns. In the two photos below you can see where the 18×11” ET46 brings the tire too close in both these two areas.


FINAL CONCLUSION:
18×11” ET44 is the best 18” configuration for aggressive tire fitments, including the 305/35/18 and 315/30/18 R-compound tires we tested on both stock and modified F8X M3 and M4 vehicles. 295/35/18 tires could also be run on 11” width wheels; luckily, they’ll fit even easier.
We preferred the 305/35/18 tire size as it’s the best overall diameter (O.D.) for the car and pairs well with 275/35/18 fronts, but there really is no downside to running the shorter 315 rear when paired with an appropriate OD front tire. The proper OD ratios are far more important as they relate front-to-rear than the gross height of all 4 tires versus the OE setup.
We know the Nitto NT01 runs narrower than the Toyo R888, so we’re confident those will fit fine. All extreme summer tires will also fit as they are narrower than these r-compounds. If you’re interested in Hoosiers R7 or BFG R1, your only choice for wide rear tires will be the shorter 315/30/18 size, which will require more attention when selecting an appropriate front fitment to match.
This fitment was tested on both a stock and slightly lowered car. The 18×11” ET44 allows stock cars to run these wide tire widths. Nothing in our testing indicated any issues with a lowered car on aftermarket suspension. Often aftermarket coilovers limit droop travel which is ideal for this application, and inner clearances are better when the car is lower. Fender side clearances are the same for modified and unmodified cars as long as alignments are similar.
In our next write-up, we’ll go through every track-oriented tire combination that can be run on the M3 and M4, as we move on to selecting the best tires for these cars.
To see and purchase these wheels for your M3 or M4, be sure to head over to our chassis-specific wheel configurator.
Tags
 Tom Maloney
Tom M.
Tom is a BMW Fitment Expert at APEX Wheels. Prior to joining the company in 2019, he worked for BMW of North America as Fleet Manager: Portland (OR) for the ReachNow car-sharing program, and as Warranty Administrator/Loaner Fleet Manager at BMW Portland. In addition, Tom has extensive training in BMW TSBs (Technical Service Bulletins) as well as in-depth knowledge of all BMW chassis and their wheel fitment options, with and without aftermarket brake and suspension upgrades. His high-performance driving experience includes autocross events in southern Oregon and track days at PIR in his 2004 E46 330i with 17x9 ET42 APEX ARC-8 wheels. Vehicles he owned prior to indulging his passion for BMWs include a 1989 Jaguar XJ6 and a 2006 S197 Ford Mustang. Fun Fact: Tom is a huge Formula 1 fan. Have questions about wheels for your BMW? Use our contact form and ask for Tom.
Wheel Fitment. Launch Alerts. Real Info Only.